Welcome to the first week of my 2019 art course!
During this week there are four different assignments for you to complete, one for illustration, one for perspective, one for design, and one for rendering.
I suggest you try to spread out one assignment over one day, that way you have a couple of extra days to polish things up before you get the next week’s assignments. Remember that if you work in a timely manner, your art is more likely to be featured at the end of the month!
Try not to get too caught up in perfectionism while working on these assignments. At the end of the day, it’s more important for your work to be finished, not perfect.
With that said, let’s get into the assignments!
Illustration assignment.
Your illustration assignment this week is to do at least five studies of large items found in nature. This includes things such as rocks, boulders, trees, stumps, logs, large corals and aquatic plants.
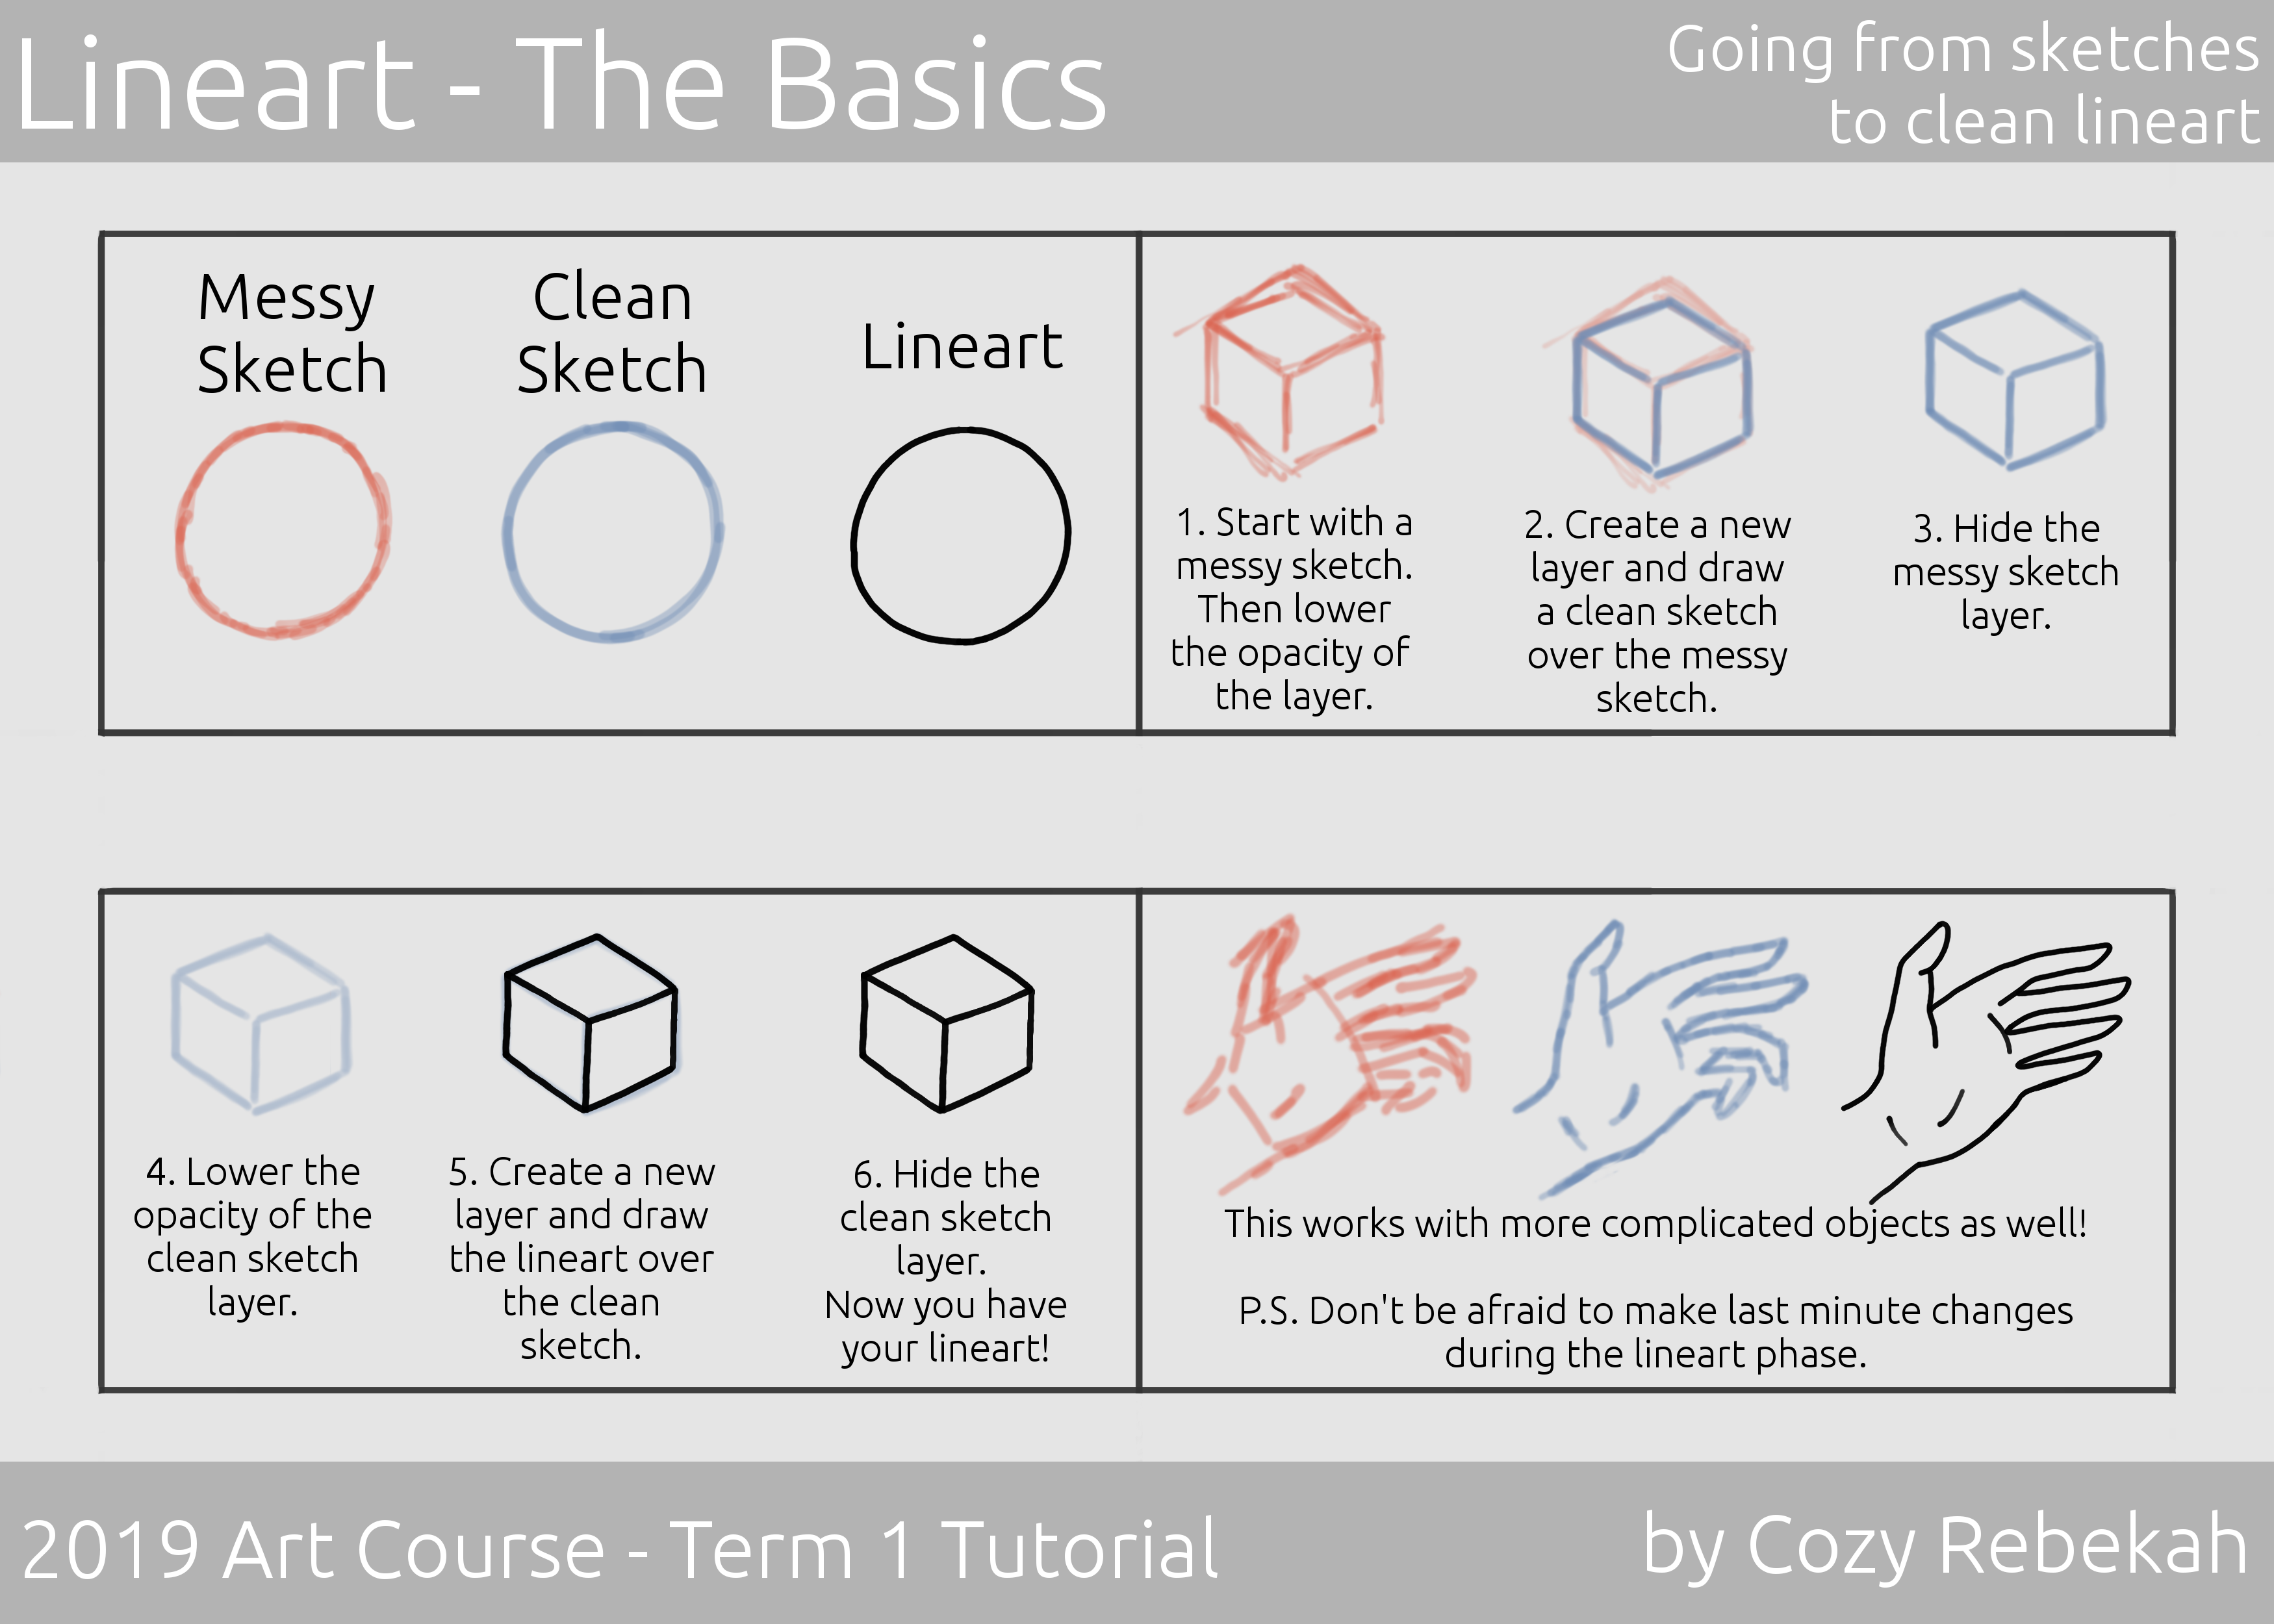
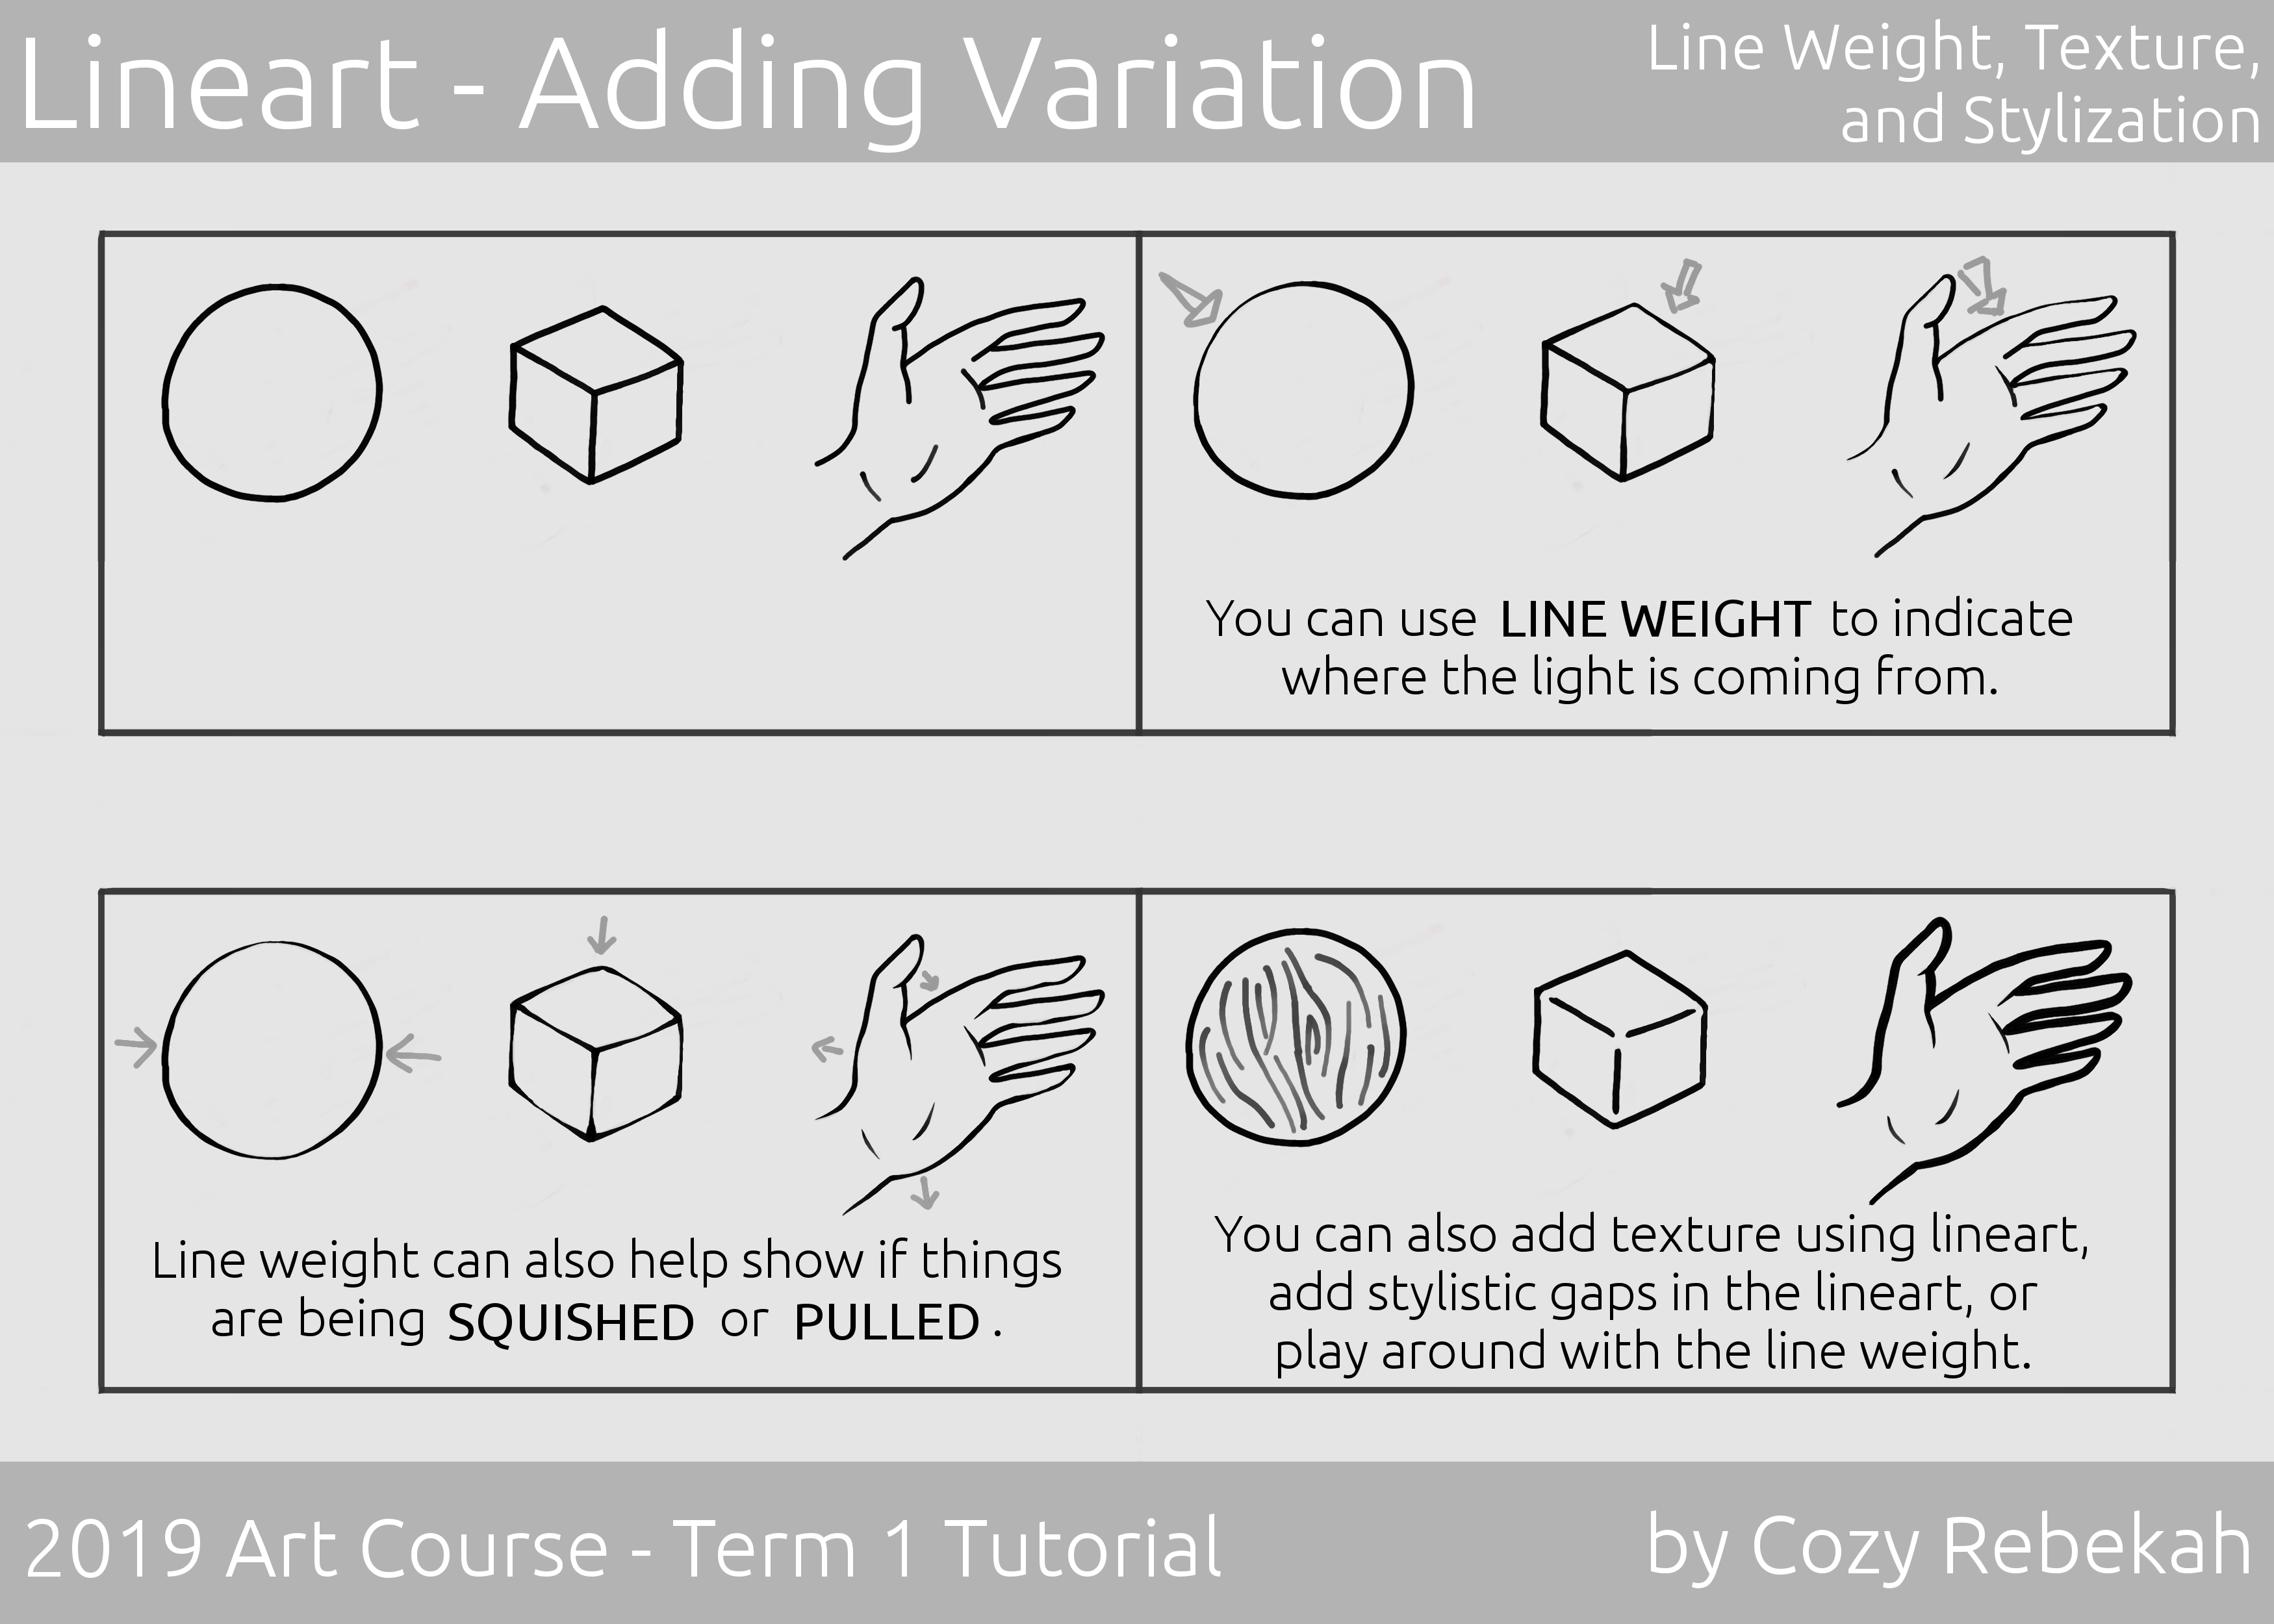
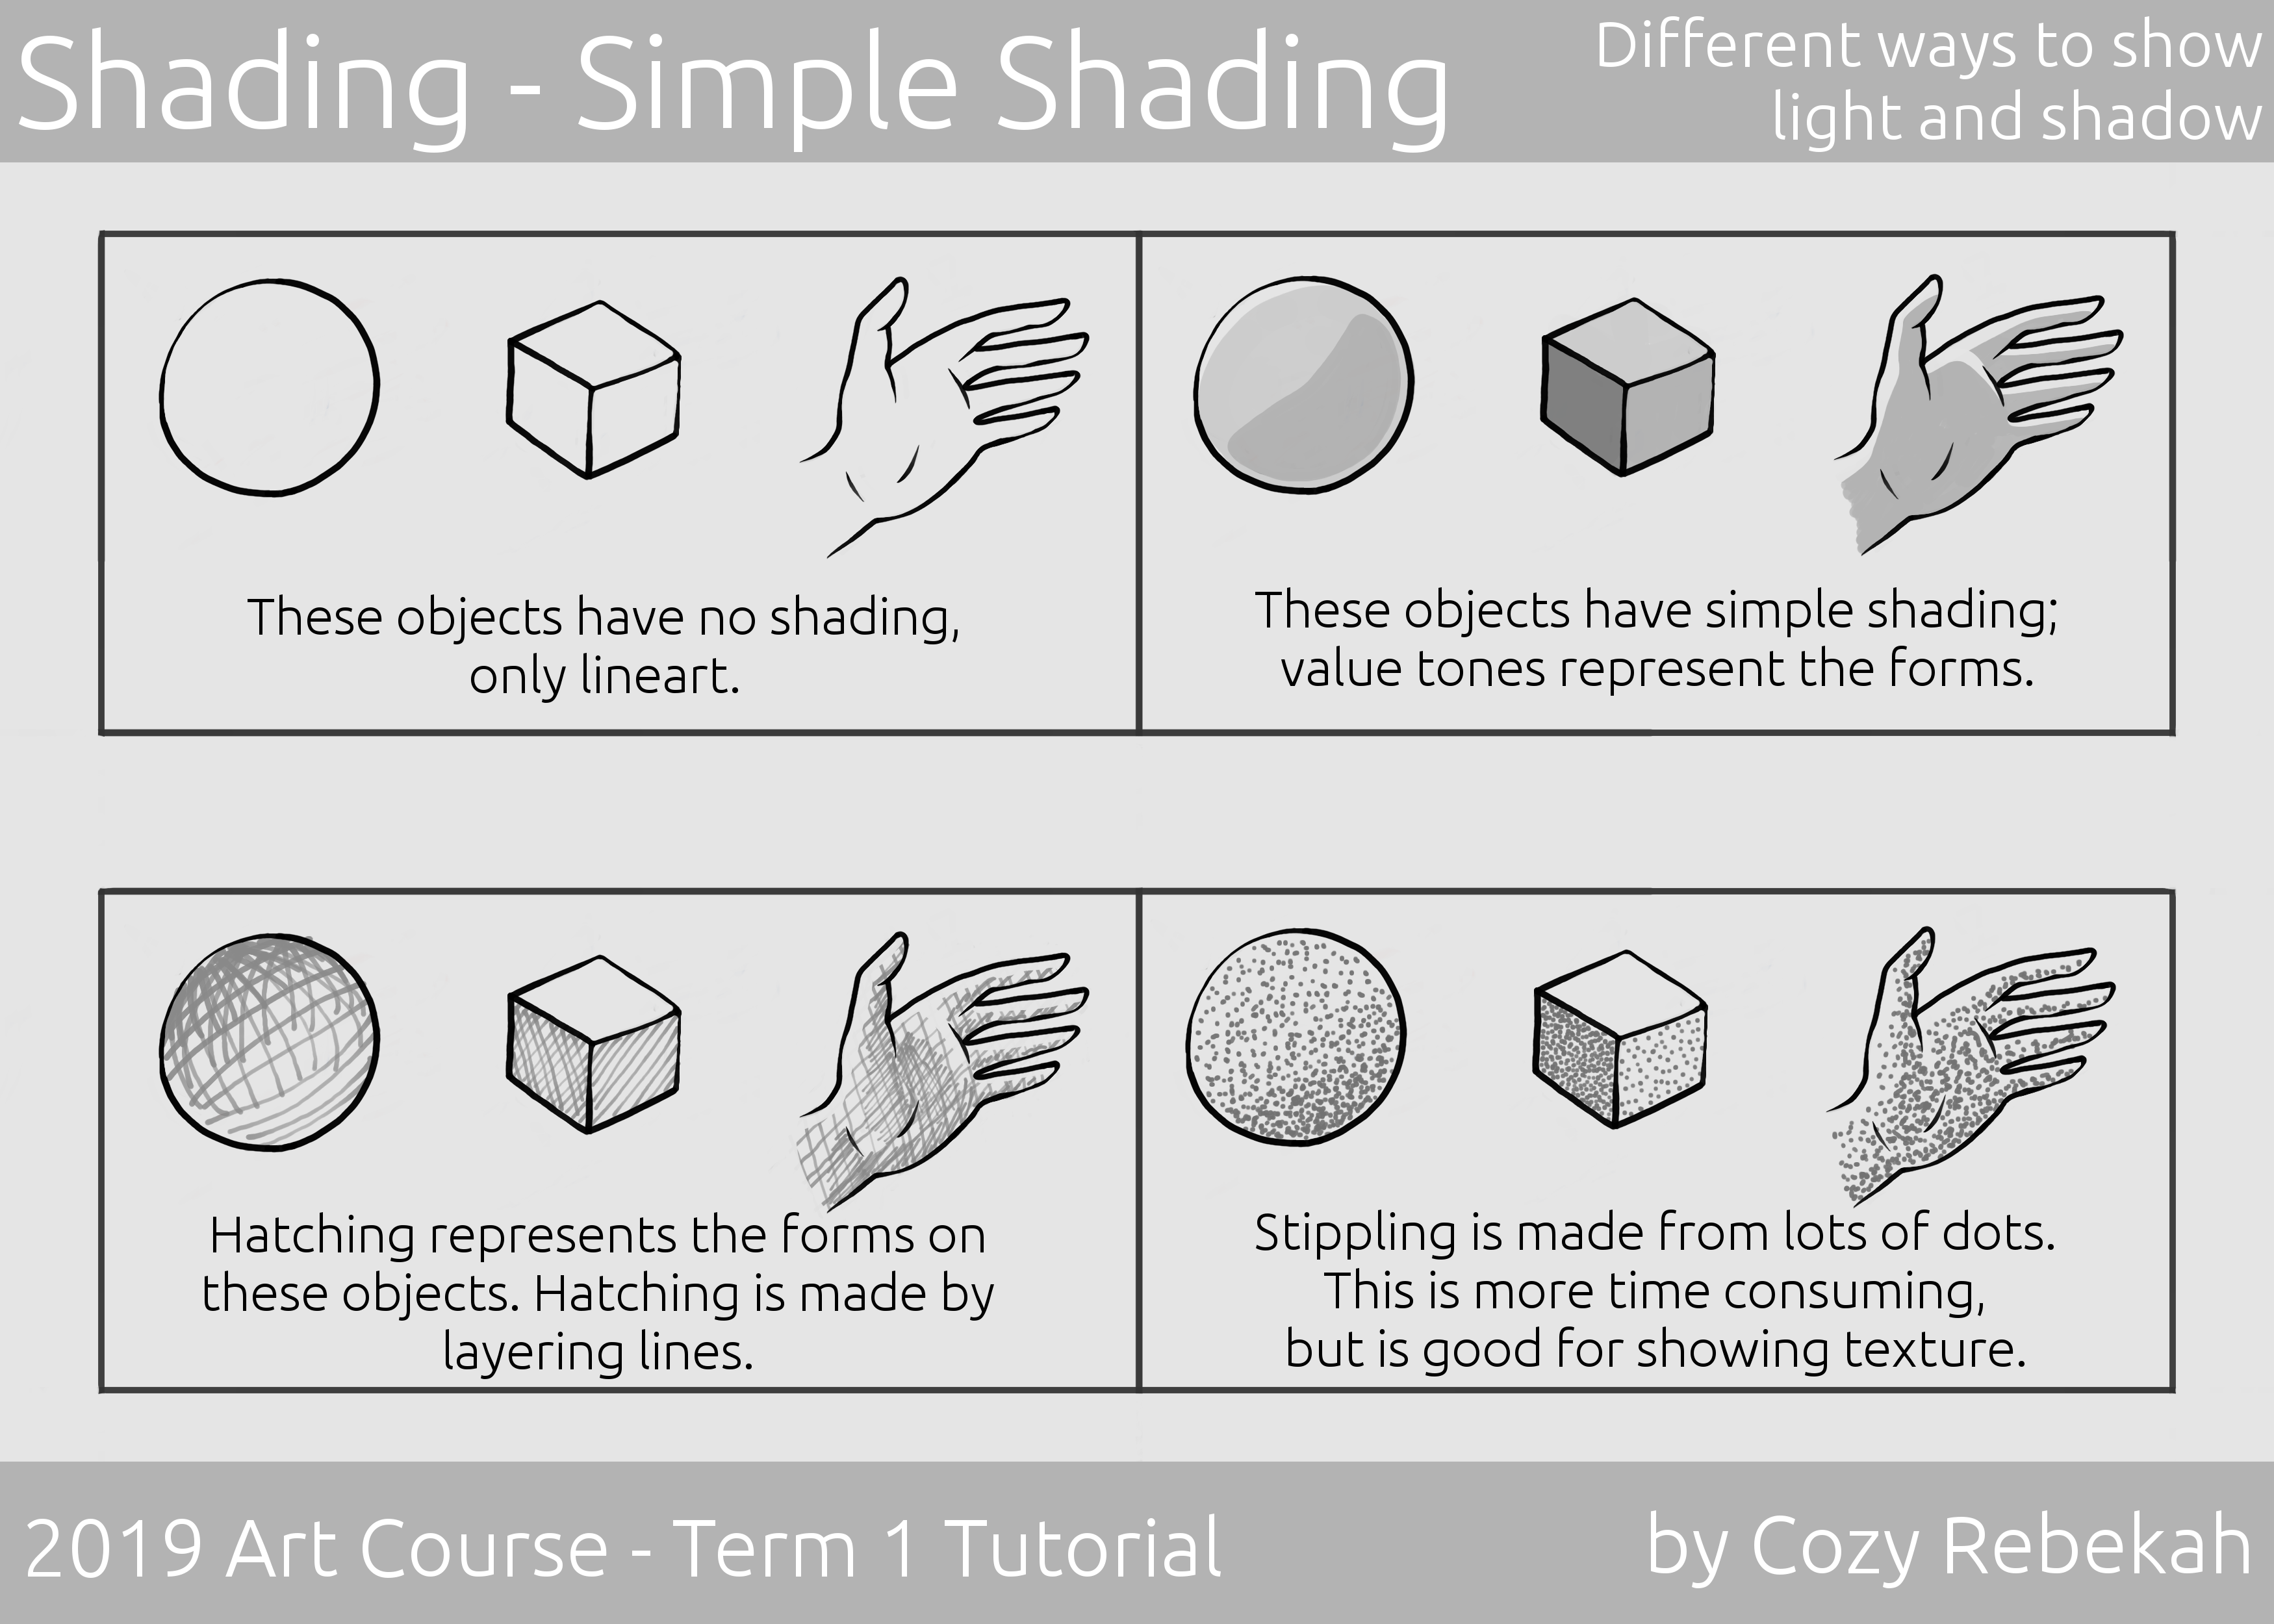
These studies will be pretty minimal, done with just lineart. Simple shading is encouraged, but not required. Please don’t render things out or use any color washes.
You may do photo studies for this illustration assignment. When working on this assignment, make sure to use references, and keep an eye on these things:
- Shape
- Volume
- Contours
- Perspective
Don’t draw what you think you know, instead, draw what you see. Take measurements, start with broad shapes, and don’t get caught up in the details.
Here are a couple of tutorials on doing digital lineart and a few different kinds of minimal shading:
I’ve already compiled some photo references for this assignment, however you are free to gather your own references.
Perspective assignment.
For the perspective assignment, please draw at least three simple objects in one point perspective. Simple objects include things such as boxes, books, Rubik’s cubes, block towers, tables, chairs, and shelves.
As with the illustration assignment, this will be fairly simple, done with lineart. Again, minimal shading is suggested, but not required. Please don’t render things out or use any color washes.
Here’s a simple tutorial on doing one point perspective:
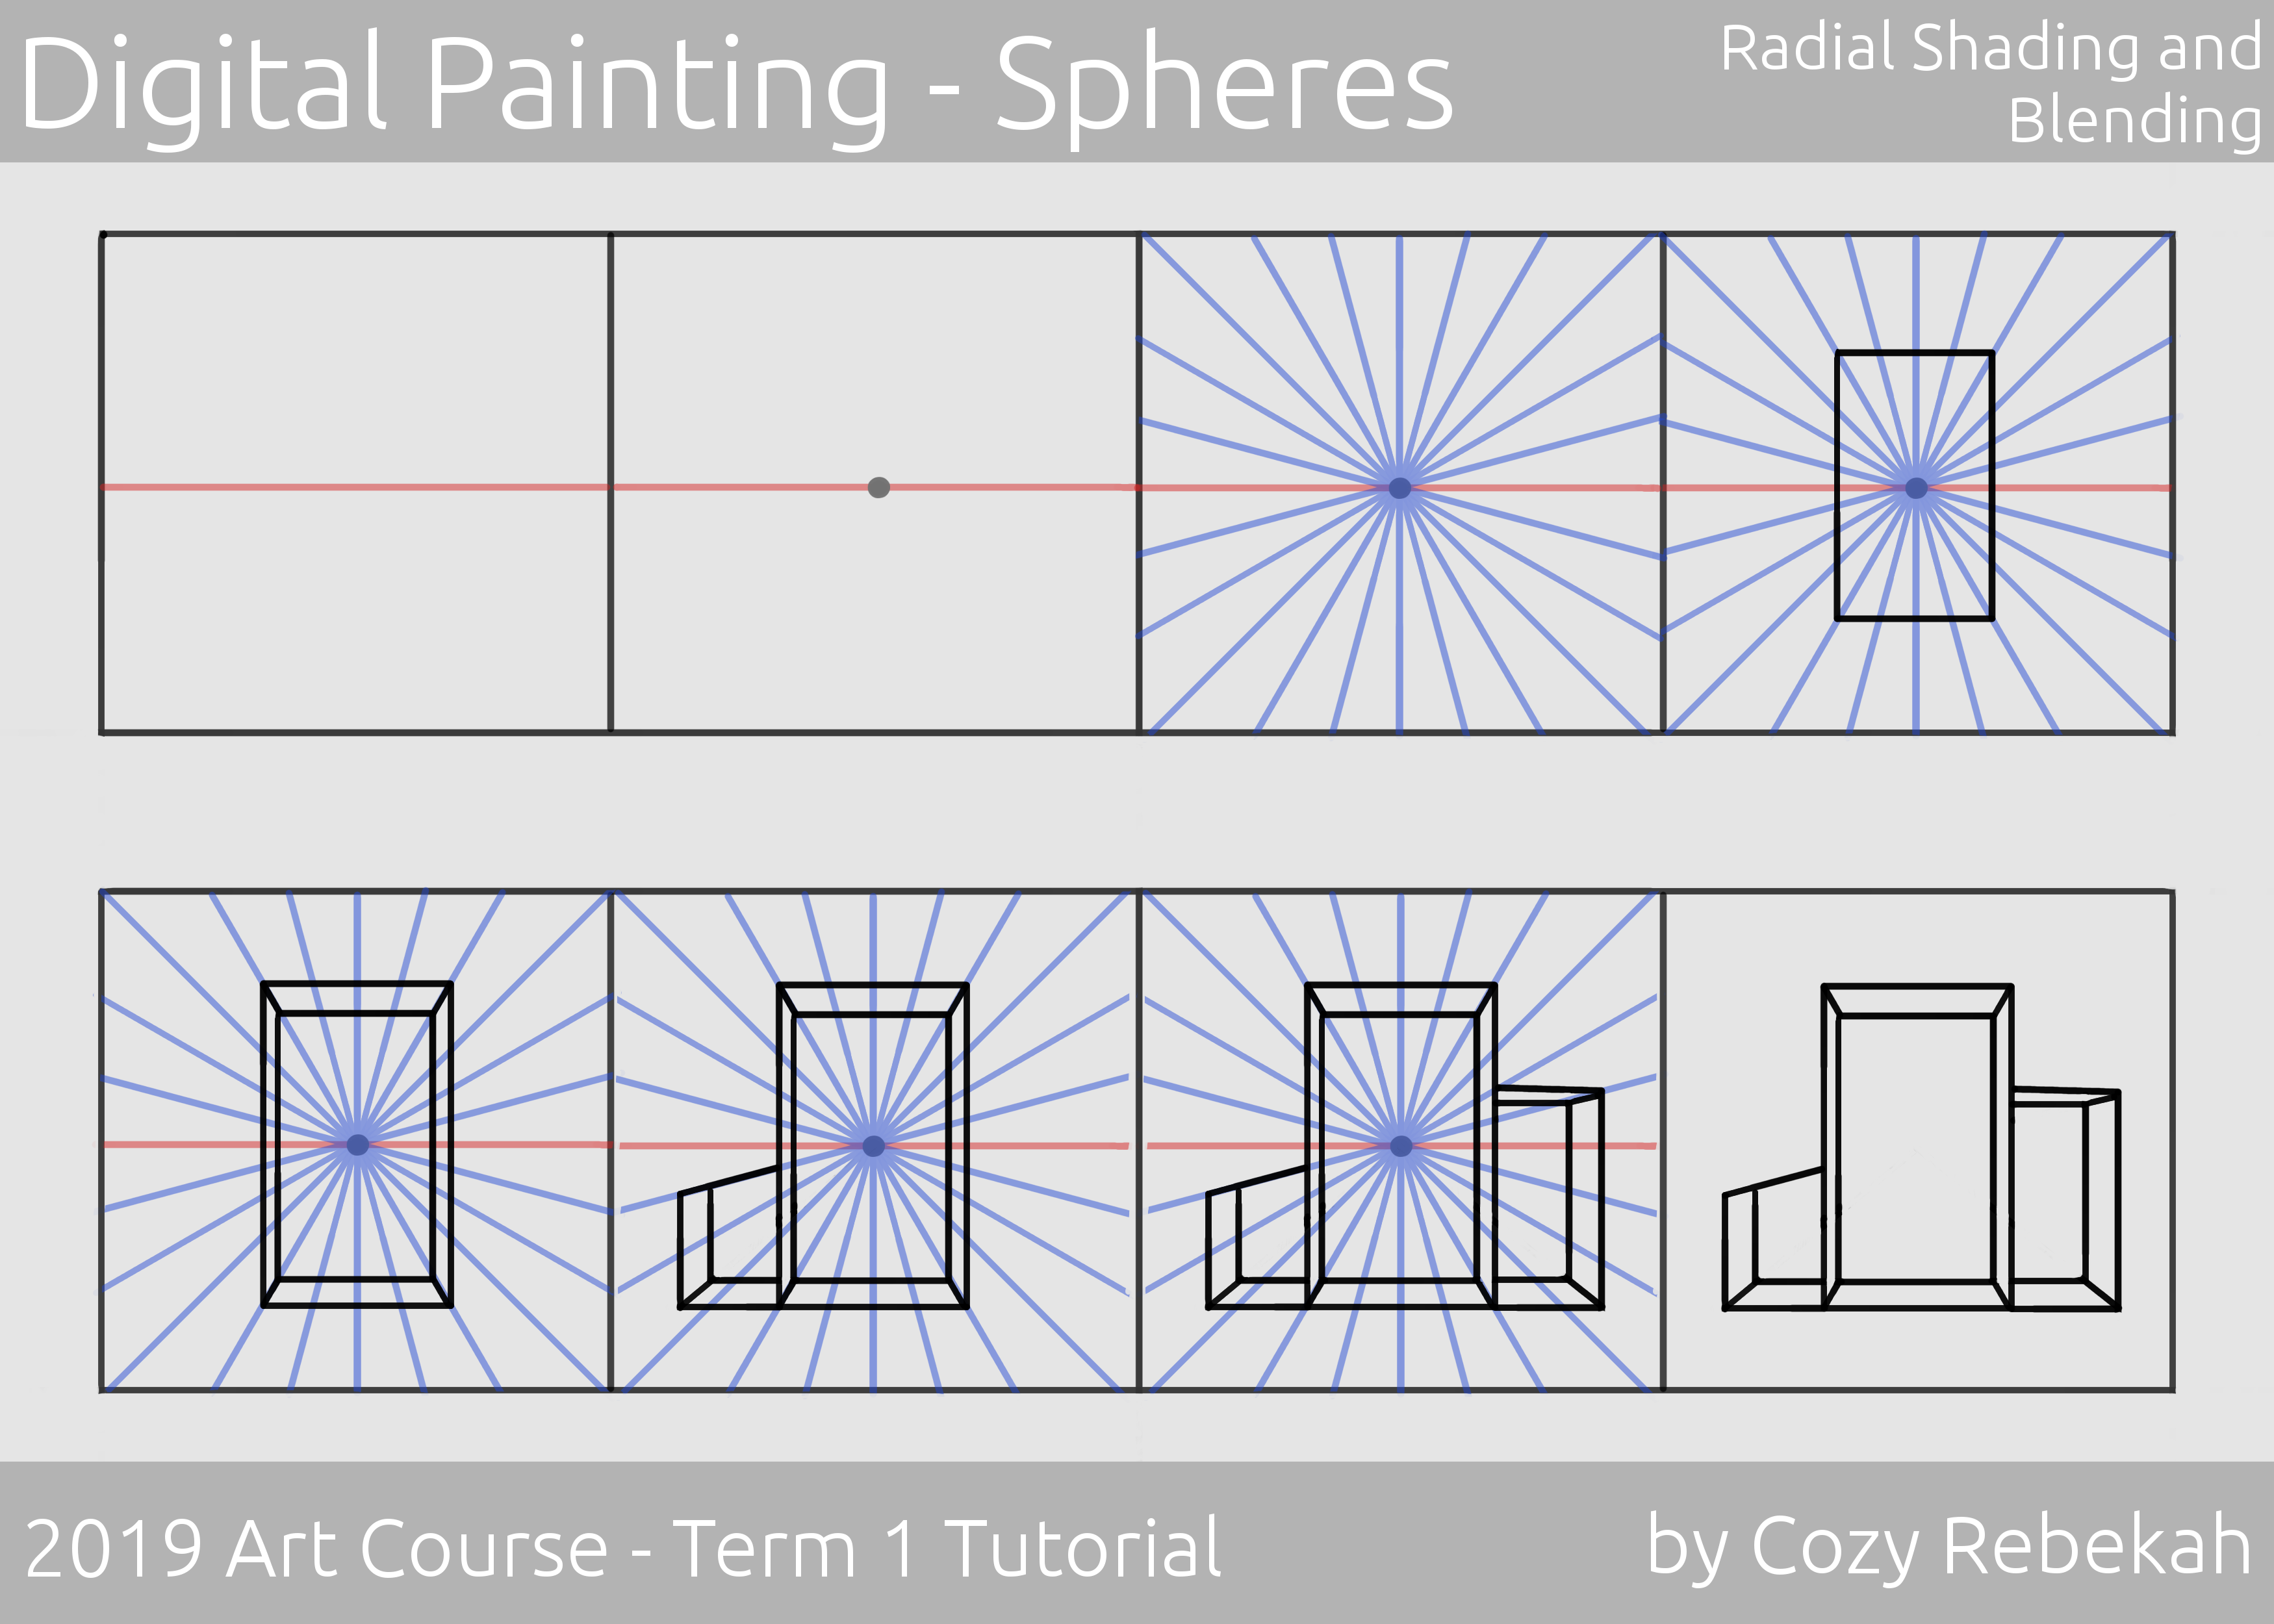
- First, I choose my horizon line, which is just the horizon.
- Then I choose my vanishing point. The vanishing point is the point that all the perspective lines come from, and if an object were to go all the way to the horizon line, it would end at the vanishing point.
- Next, I add some perspective lines extending outwards from the vanishing point. These are guidelines that will help me draw things in perspective.
- From that point on, I start drawing boxes, making sure that all of the lines that are in the direction of the vanishing point are pointed towards it. This is what adds depth to the illustration.
- When I’m finished I hide the layers that had the vanishing point, horizon line, and perspective lines. This is an optional step, but it helps when trying to see the finished shape more clearly.
If you want more information on one point perspective, watch this helpful video: https://www.youtube.com/watch?v=XRrKohWdpeQ
I’ve compiled photo references for this assignment, however this is not a photo study, so your perspective studies should not look exactly like the reference pictures. Try to do different angles than the reference pictures, and add your own personal touches.
Of course, you are free to find your own references if you want.
One point perspective tip: The lower the horizon line, the closer to the ground you are. The higher the horizon line, the higher up you are. You can use this create interesting compositions.
One point perspective tip: While in my tutorial I put the vanishing point in the middle of the canvas, putting it off to the side can create more interesting angles.
One point perspective tip: Want to find the center point on a plane that’s in perspective? Draw an X through it. The center of the X is the center point of that plane.
Design assignment.
Your design challenge for the next two weeks is to design flower pots!
For this week you’ll start with creating a mood board for your design. Find some reference images of flower pots, as well as some inspiration images. Your inspiration images cannot be of flower pots, they must be of something unrelated.
Get around three to five inspiration images to work with. If you’re stuck on finding some inspiration or reference images, I’ve already collected some reference images here and some inspiration images here.
Next, compile those onto one document. Here’s an example of a mood board for tea pot designs:
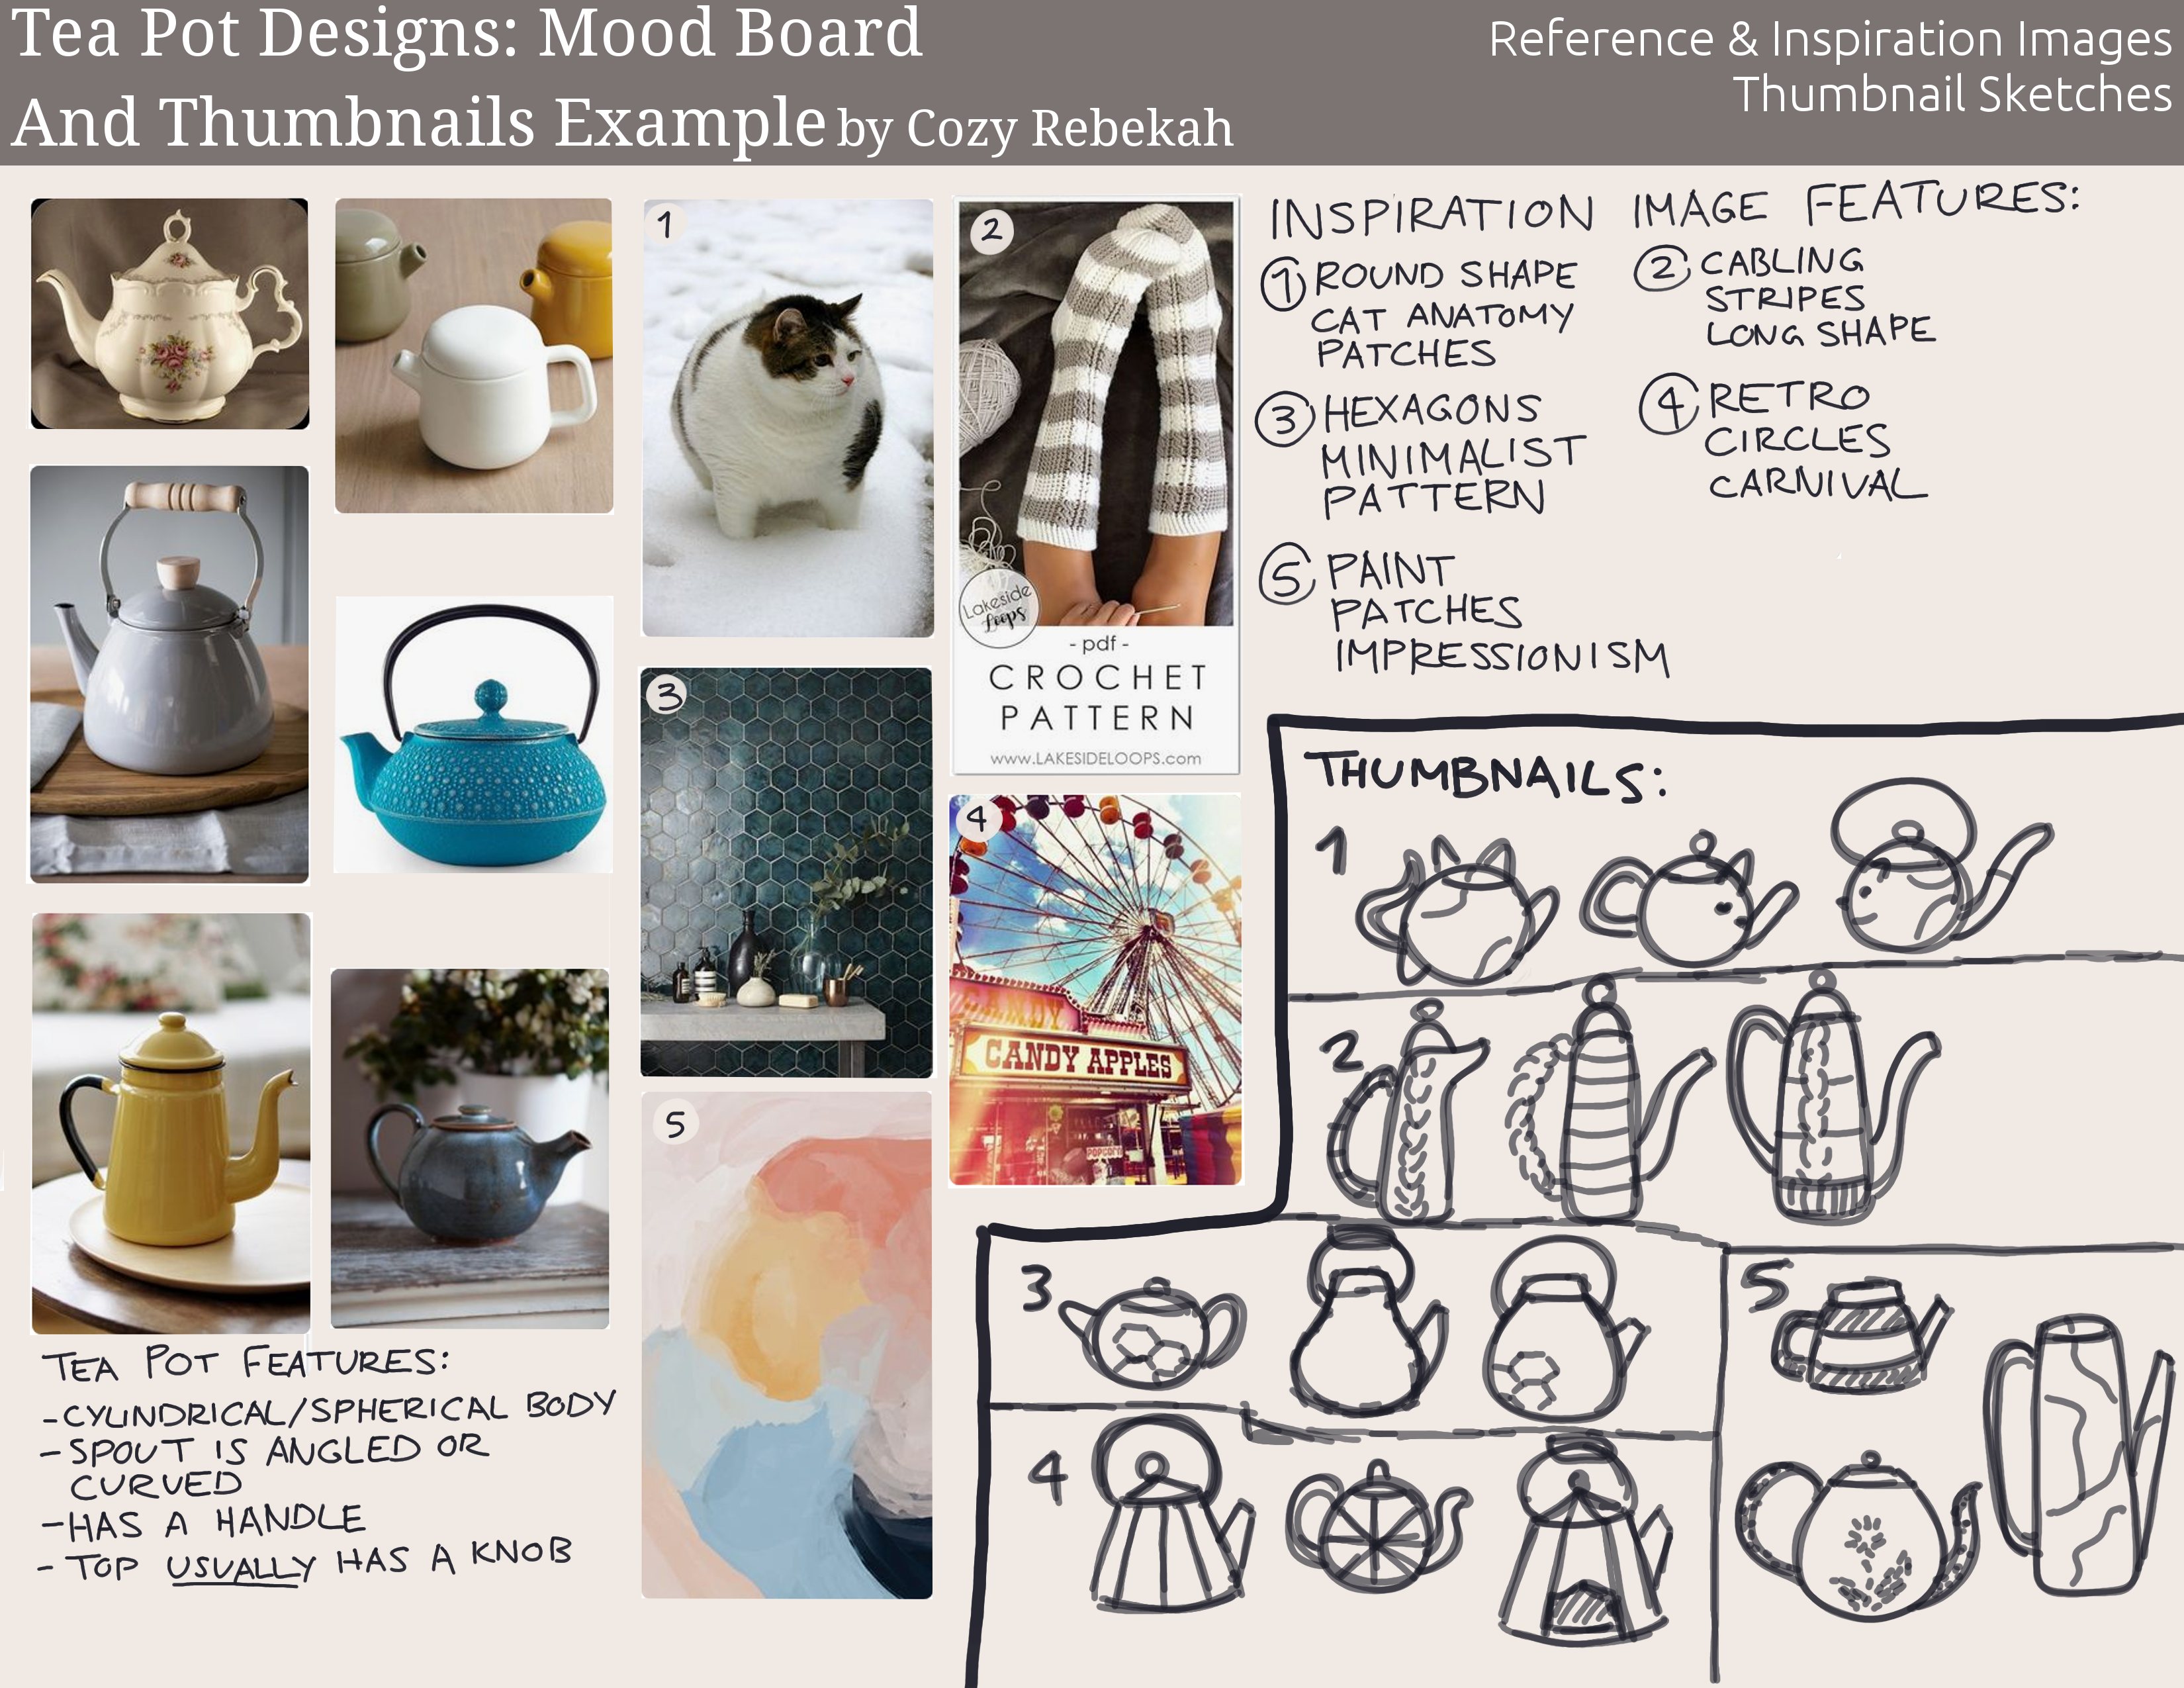
As you can see, I’ve also listed some of the features that tea pots have. I suggest doing this to avoid forgetting any important features while designing.
I’ve also made a list of a few words that I feel when looking at my inspiration images. This helps me keep ideas in mind while I’m designing.
After you’ve made your mood board, you can start making thumbnails for your designs. Thumbnails are small and rough sketches that you use to get ideas out. Please do at least three thumbnail designs per inspiration image you have.
This means that if you have three inspiration images, you should have at least nine thumbnail designs.
Please don’t add any shading or color to your thumbnail.
Design tip: Don’t get too caught up in the details while making your thumbnails. They should be clean and readable, but still loose enough that you can expand upon your ideas next week.
Design tip: Pay attention to the shape and silhouette of your overall design, as these can communicate a lot to your viewer.
Rendering assignment.
Rendering in art is about making things look three dimensional with shading and lighting. For your first rendering assignment, please do a photo study of simple shapes.
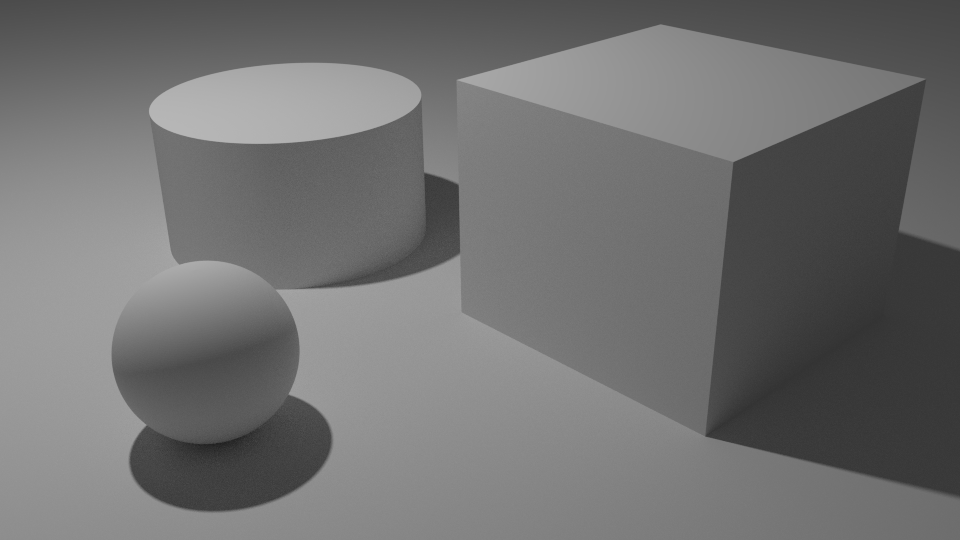
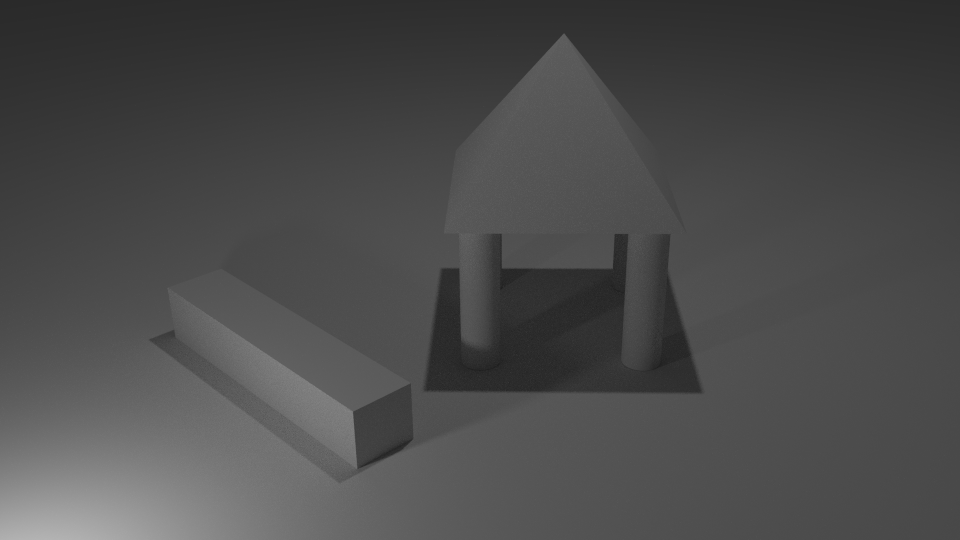
Here are the possible reference images to base your photo study off of:
Level 1 photo references (1 light source, 3 shapes)
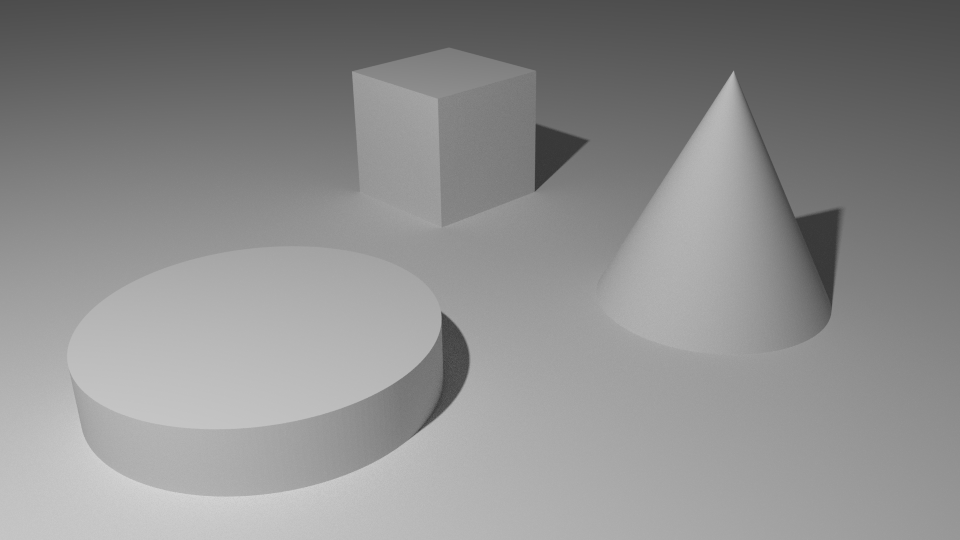
Level 2 photo references (1 light source, 5 shapes)

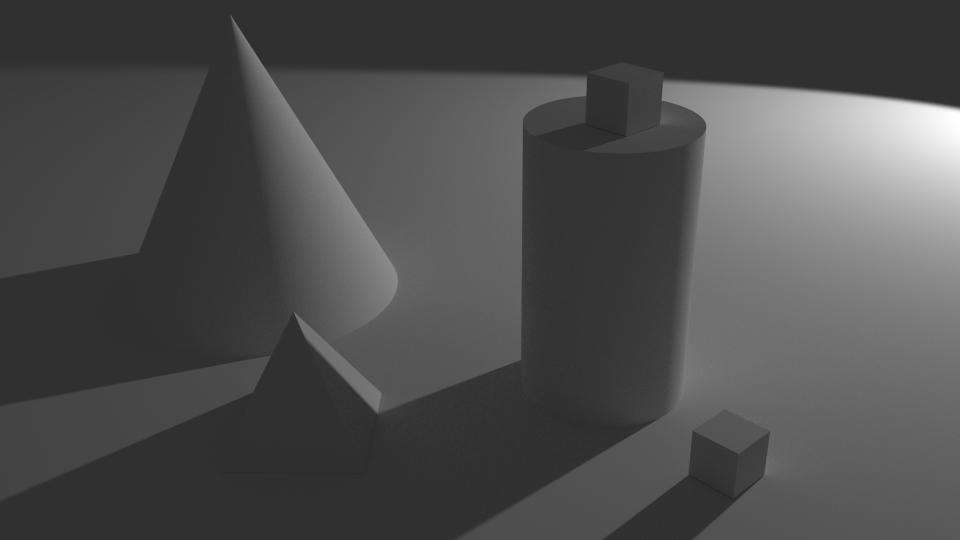
Level 3 photo reference (2 light sources, 6 shapes)
When doing photo studies, try to get very close to likeness of the photo reference.
If you’re new to rendering, don’t bite off more than you can chew. Start with one of the simpler photo references, and build up your skills.
There should be no lineart in your finished artwork for this assignment, as the shading and edgework should be enough to communicate the different shapes in each study.
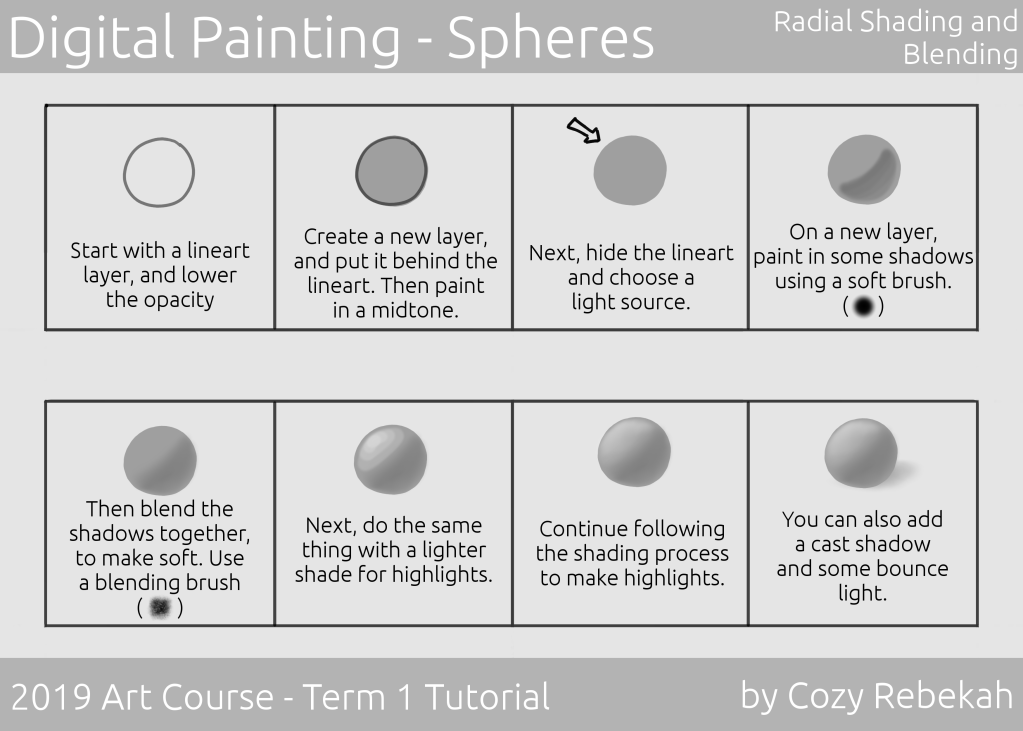
Here’s a small tutorial on how I tend to tackle rendering round shapes:
Here are also a couple of other tutorials on different ways to paint digitally:
https://www.youtube.com/watch?v=-Nt9fa8jZUE&list=LLua-4BDkI0u2AycoEb-m5LQ&index=3&t=0s
https://www.youtube.com/watch?v=aMHJFdgRjYk&list=LLua-4BDkI0u2AycoEb-m5LQ&index=4&t=0s
Rendering tip: If you’re feeling overwhelmed about shading, start by breaking down shapes into blocks of shadow and light.
Rendering tip: If you’re working traditionally with pencils, using something to blend your shading on round objects will make them look more smooth.
Sharing your artwork.
If you’re going to be sharing your artwork on your website, please let me know so that I can check it out.
If you’re going to be sharing your work on Instagram, please tag me in it (@cozyrebekah) and use this hashtag: #crartcourse
Let me know if you also want some constructive criticism on your artwork. Often times it can be difficult to see our mistakes, so having a more objective eye can help us improve more quickly.
The week 2 assignments will be posted at 10:30 a.m. ET on the 13th of January. For a better chance of having your artwork featured at the end of the month (on the 25th), please post your work for this week’s assignments before then.

Small question, can I draw on paper? Or does it have be digital
LikeLike
If you don’t have digital tools then feel free to use traditional. However once the second term starts, most of the work will be easier to do digitally. 🙂
LikeLiked by 1 person
Can’t wait to get started! When’s the due date for the first little challenge thing?
LikeLike
For a better chance to be featured at the end of the month, please share your art work for the assignments by the end of this week (before Jan 13) 🙂 You can do the assignments in any order you want to.
LikeLiked by 1 person
Okay, sorry I comment twice. I thought my first comment didn’t go through and I’m was being a general dim wit. Anyways, I’ll definitely get started as soon as possible! Thanks for the reply
LikeLike
It’s no problem, your comment just had to be manually approved since it was your first time commenting on this site 🙂
LikeLiked by 1 person